

Why Custom Hats Remain Essential for Brands and Groups
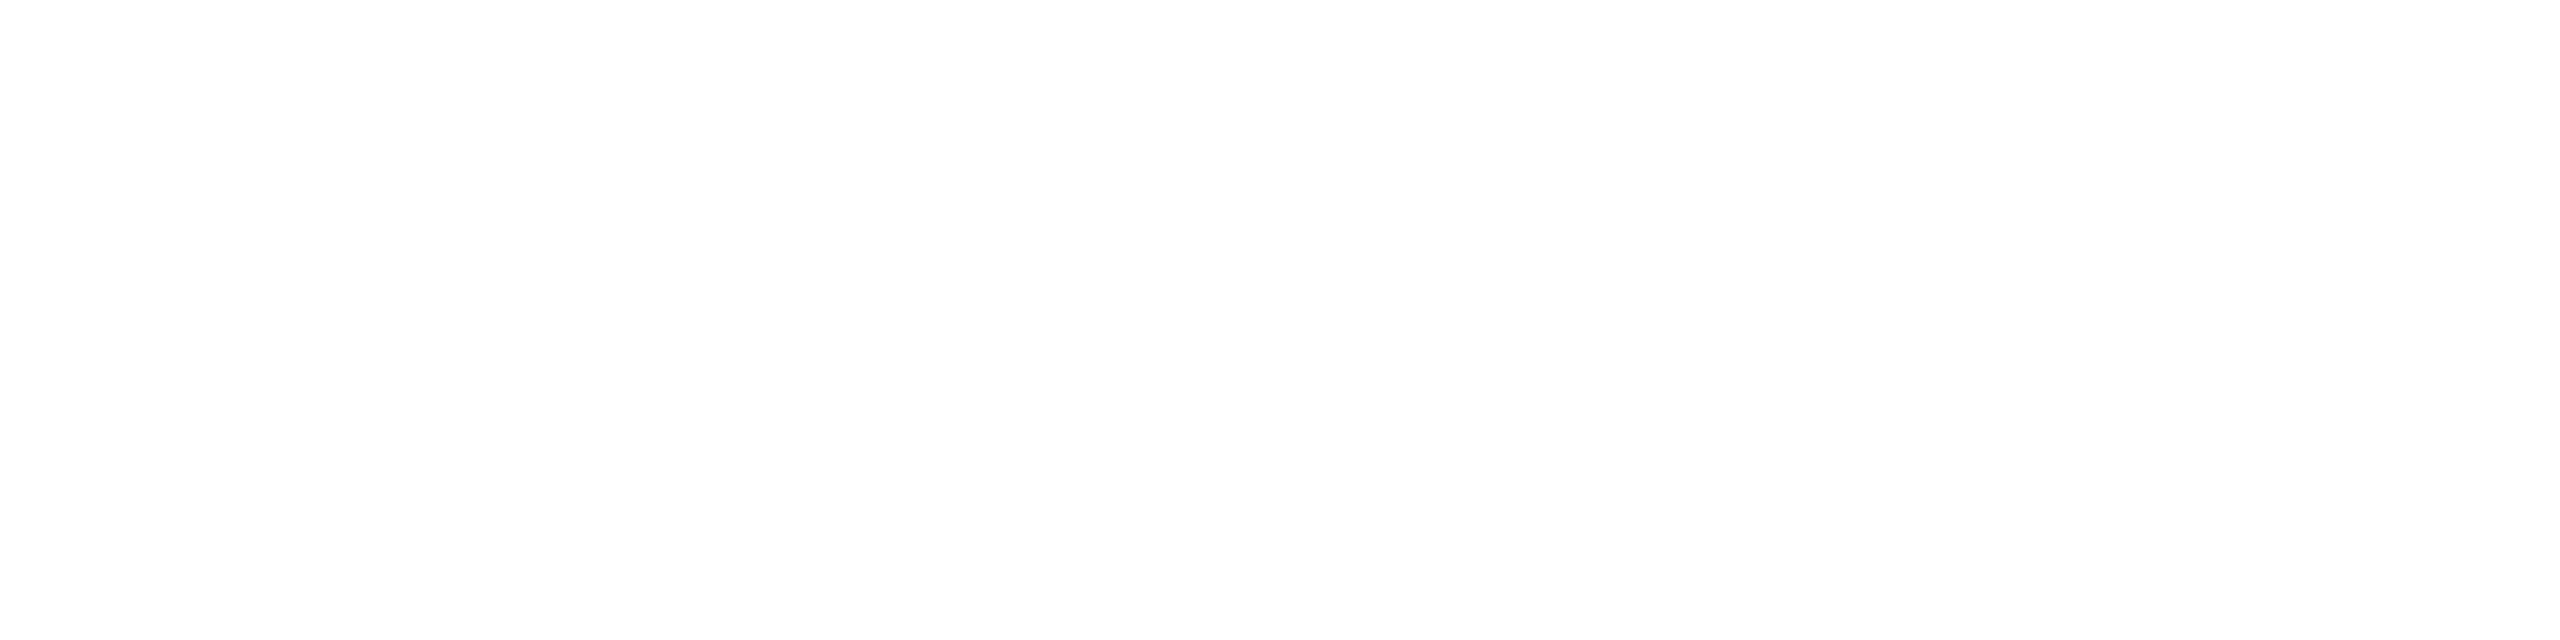
Headwear has a massive advantage over other promotional items: it has universal appeal across almost every single demographic. A well-made cap looks just as natural on Gen Z streetwear fans as it does on a corporate team at a tech conference. Because a hat is worn at eye level, it offers incredibly high daily visibility, making it one of the most cost-effective marketing tools you can invest in. The real secret to custom hats is emotional connection. Unlike cheap plastic pens or generic flyers, people actually keep, care for, and wear quality headwear for years. This longevity turns a simple product into a long-term branding asset.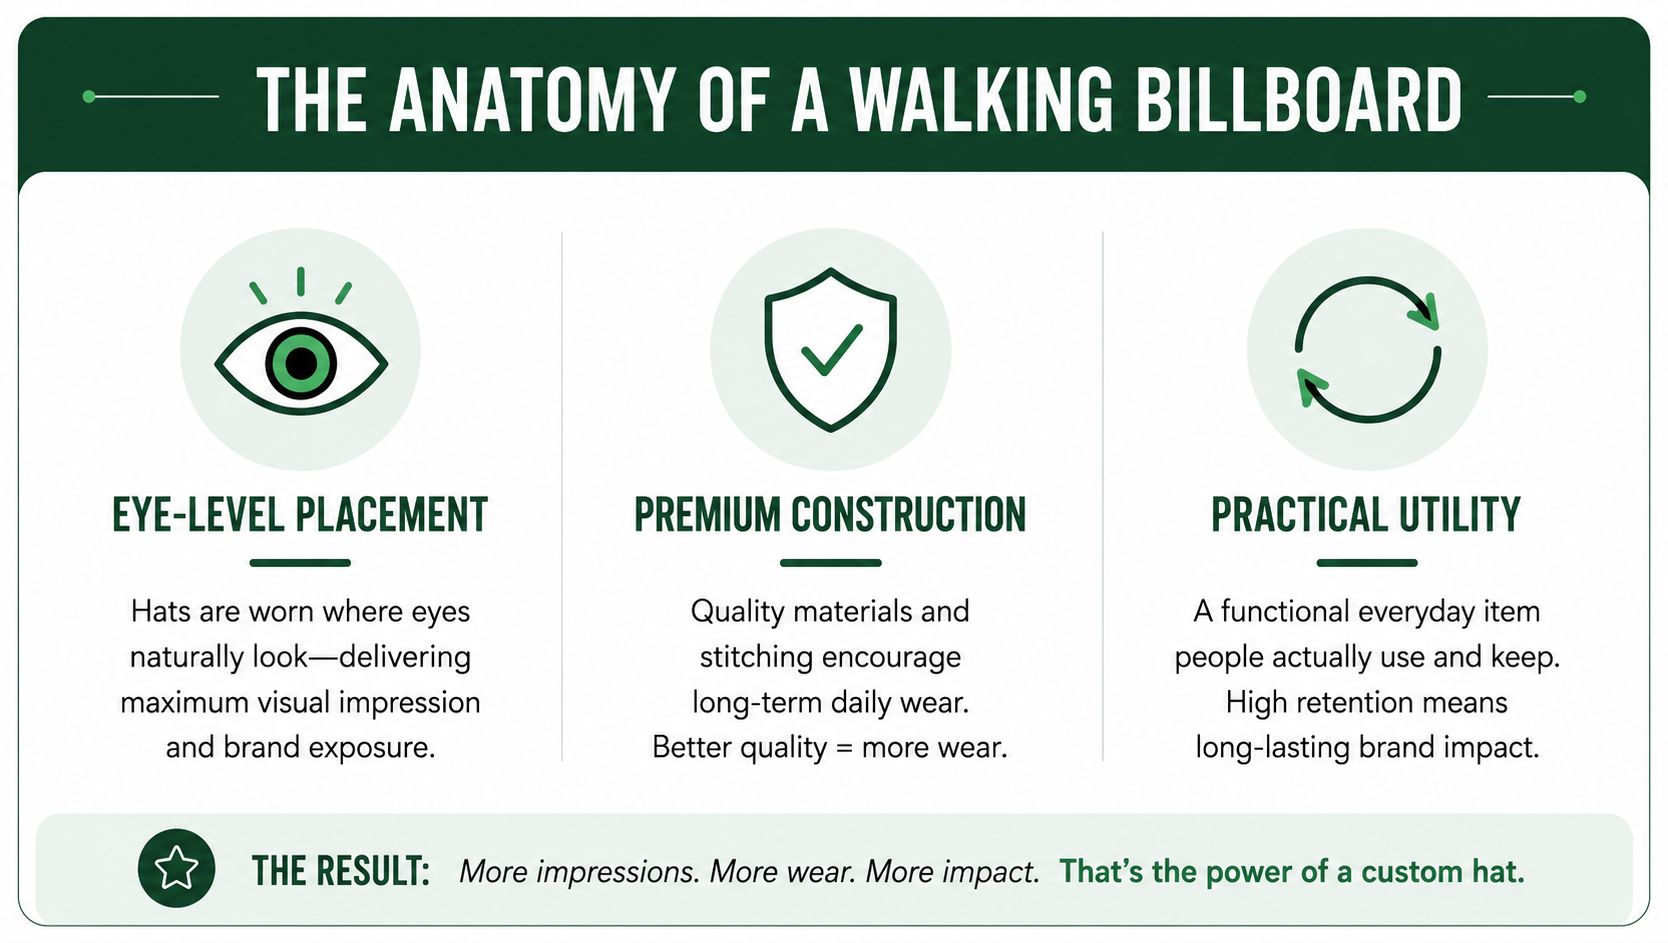 Headwear is also incredibly versatile. It works fluidly across businesses, sports teams, experiential events, non-profits, and personal creative projects. Look at real-world success campaigns: a small local café can design a minimalist dad hat that regulars proudly wear around town, turning customers into active brand ambassadors. On a larger scale, music festivals use structured snapbacks as high-margin merchandise that double as a lasting keepsake for fans. Once you understand why headwear works so well, the next step is picking the right physical style for your project.
Understanding Different Custom Hat Styles for Your Needs
Your style choice directly affects wearer comfort, your available design space, and how people perceive your brand. Here is how to match the right hat style to your specific goals.Custom Dad Hats—The Go-To for Minimalist Branding
Dad hats feature an unstructured crown, a curved brim, and a soft, relaxed fit that molds naturally to the wearer’s head.- Perfect for: Coffee shops, tech startups, wellness brands, and casual lifestyle companies.
- Design tips: Stick to small centered logos, subtle side panel embroidery, or clean back text. Because the fabric is soft and unstructured, large or overly dense logos can cause the material to bunch up and wrinkle.
- Why they’re trending: Their low-key, effortless aesthetic appeals heavily to millennials and Gen Z consumers.
Custom Snapback Hats—Maximum Impact for Bold Logos
Snapbacks are defined by their stiff, structured front panels, a flat brim, and an adjustable plastic snap closure.- Perfect for: Streetwear brands, music merchandise, sports teams, and bold creative statements.
- Design tips: The rigid, upright front panels act as a flat canvas, making them the absolute best choice for large, intricate embroidered logos that need to stand out.
- Material note: Opt for a wool blend rather than standard cotton twill if you want a premium, heavy-duty retail feel.
Custom Trucker Hats—Breathable and Perfect for Active Lifestyles
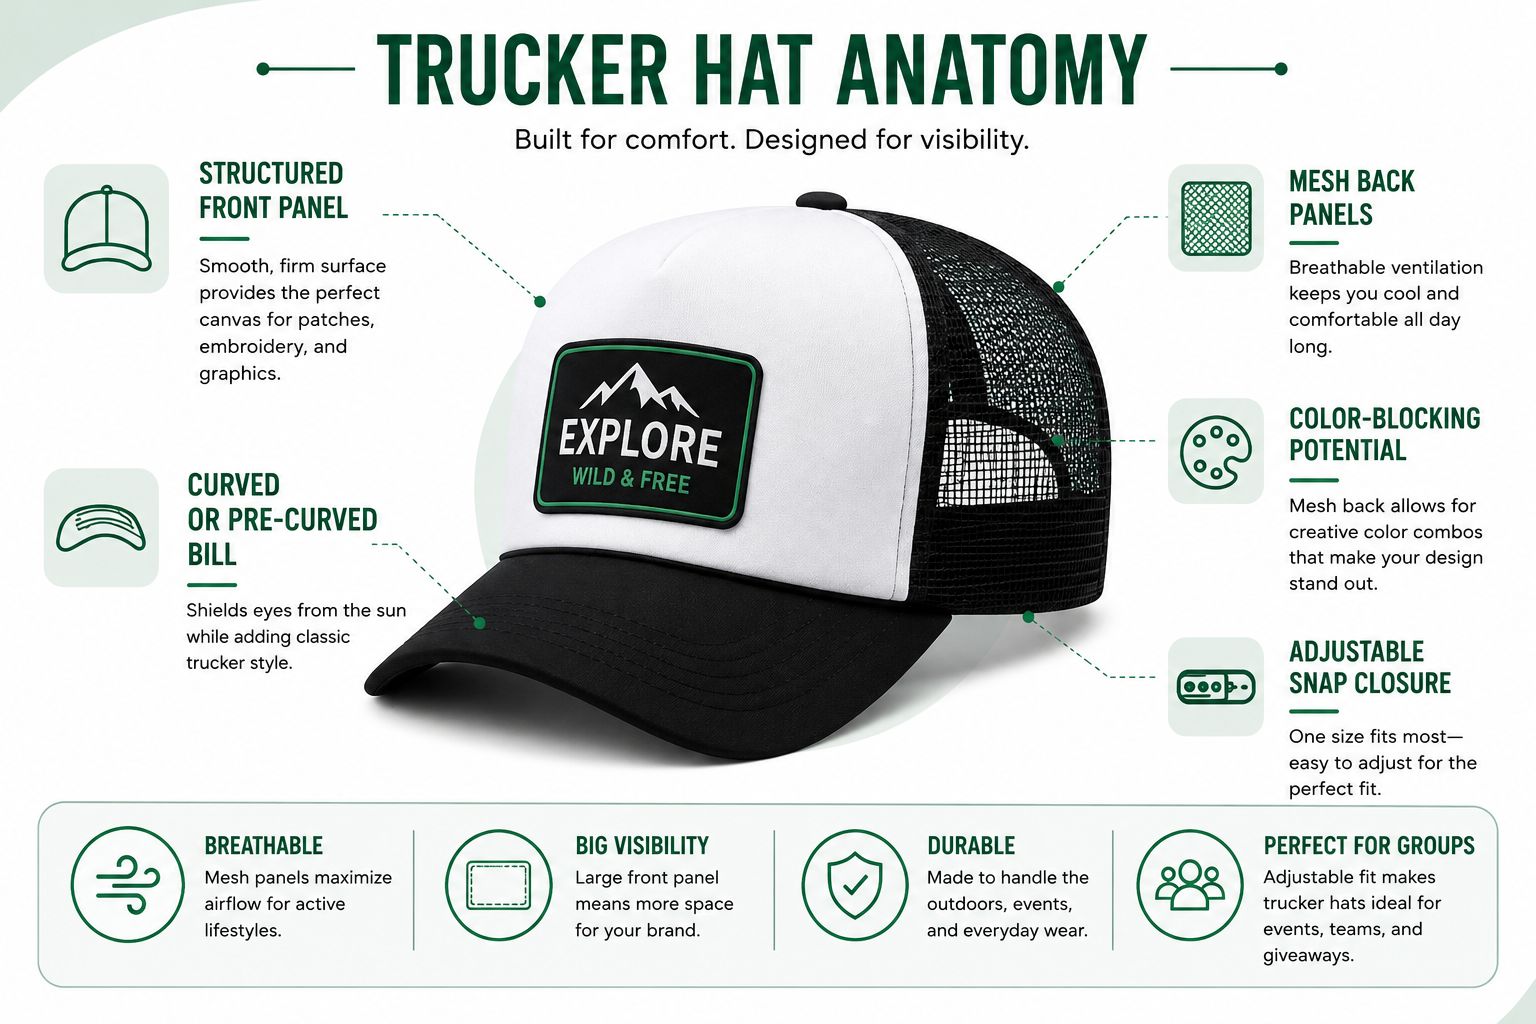
Trucker hats feature a solid foam or fabric front panel paired with breathable mesh back panels for maximum ventilation.
- Perfect for: Outdoor brands, summer events, breweries, and active lifestyle companies.
- Design tips: The smooth front panel is uniquely suited for custom patches, while the mesh backing allows you to use creative color-blocking to match your brand colors.
- Why they work: They are comfortable during physical activity, which naturally increases how often people wear them.
Specialty Styles—Bucket Hats and Beanies for Seasonal Campaigns
When running seasonal marketing pushes or targeting specific fashion trends, specialty silhouettes expand your options.- Bucket Hats: A staple for summer festival merchandise, warm-weather branding, and brands leaning into the Y2K fashion revival.
- Beanies: Essential for winter team apparel, ski resorts, and cold-weather outdoor events.
- Design considerations: Embroidery placement differs significantly here—beanies require adjustments for flexible knit fabrics, while bucket hats offer a continuous, low-profile canvas.
Quick Style Comparison
| Hat Style | Structure | Best Target Audience | Ideal Branding Method |
| Dad Hat | Unstructured / Relaxed | Millennials, Gen Z, Casual Brands | Small, clean flat embroidery |
| Snapback | Rigid / Structured | Streetwear, Sports, Music Merch | Large embroidery or 3D puff |
| Trucker Hat | Structured Front / Mesh Back | Outdoors, Fitness, Breweries | Custom Patches (Leather/PVC) |
Creating Custom Hat Designs That Look Professional
Because headwear offers limited, curved design space, simplicity and clarity beat complexity every single time.The Golden Rule—Simplify Your Logo for Hat Embroidery
Detailed artwork that looks great on a digital screen or a flat t-shirt often fails on a hat. This is due to physical stitch count limitations and the small canvas size. To keep your design clean, ensure your primary logo stays within 3 to 4 inches wide for front panel placement. Before sending your artwork to a manufacturer, remove:- Any thin vector lines under 1mm in thickness.
- Tiny, compact text under 6-point font.
- Intricate design details and complex gradient color fills.
Color Selection Strategy for Maximum Visibility
High contrast is non-negotiable if you want your design to pop. The rule is simple: use dark threads on light hats, and light threads on dark hats.- Avoid combinations that disappear: Navy thread on black hats, white thread on cream, or olive on sage.
- Winning combinations: White on black, gold on navy, red on gray, or black on khaki.
- Pro Tip: Metallic threads (like gold and silver) are fantastic for creating an upscale, premium look on a simplified logo without making the design overly busy.
Strategic Logo Placement Beyond the Front Panel
While the front center is the most common choice for maximum visibility, modern brands use multiple placements to build a retail-ready product.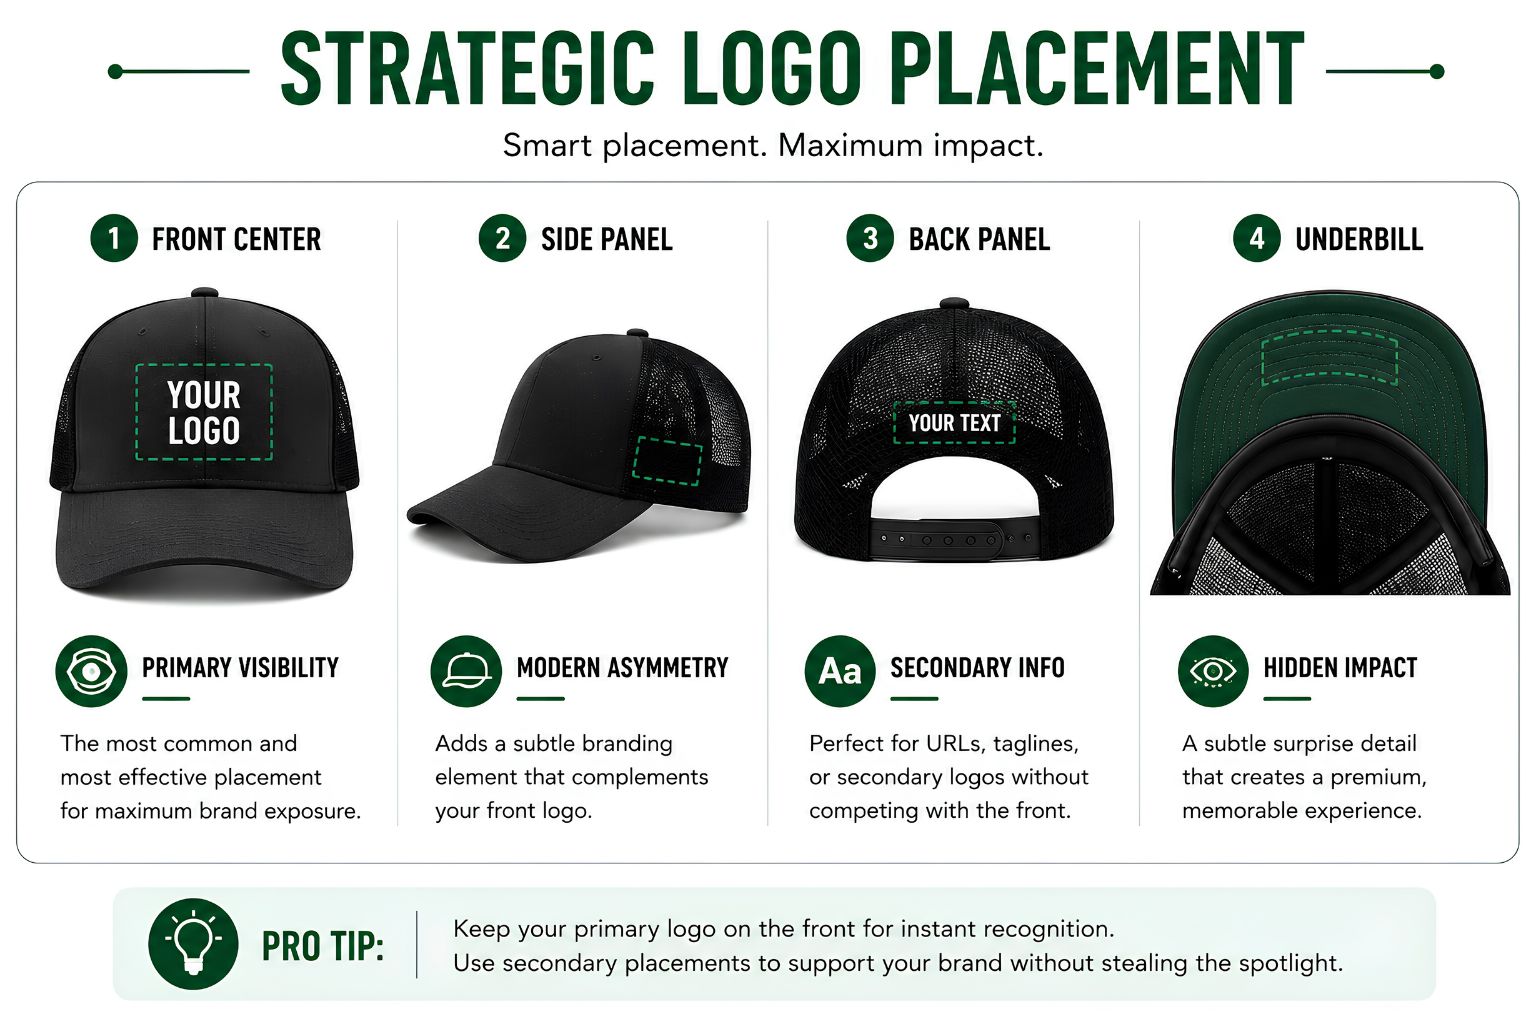
- Front Center: Your primary branding location for instant recognition.
- Side Panel: Offers a modern, clean, asymmetric look that is perfect for small secondary icons, dates, or sub-logos.
- Back Panel: Positioned right above the closure loop; ideal for company URLs, short taglines, or minor branding elements that shouldn’t compete with the front design.
- Underbill Branding: Putting a graphic on the underside of the brim is a popular “hidden” design trend in streetwear merchandise.
Choosing the Best Decoration Method for Custom Hats
The decoration method you choose changes the texture, final cost, and visual style of your headwear. Here is how the primary industry techniques perform.Custom Embroidered Hats—The Industry Standard for Good Reason
Machine embroidery dominates custom headwear because it is incredibly durable through regular washes and carries a high perceived retail value.- Flat Embroidery: The standard needle-and-thread method. It works perfectly for most logos, handles text cleanly, and remains highly cost-effective.
- 3D Puff Embroidery: Uses a raised foam backing under the stitches to create a bold, dimensional effect. It looks ultra-premium but costs more and requires thick, simplified geometric shapes to cleanly cover the foam.
- Production Note: Keep in mind that a higher stitch count increases machine production time, which will bump up your per-unit cost.
Custom Patches—Premium Texture and Unique Aesthetic
Patches are an incredible alternative for brands wanting distinct physical texture and crisp detail preservation.- Leather Patches: Deliver a rugged, outdoor aesthetic that looks phenomenal on trucker hats and dad caps.
- PVC Patches: Waterproof, rubberized patches that allow for sharp, modern, 3D geometric lines.
- Woven Patches: Use ultra-fine threads woven tightly together. This technique captures intricate details that traditional embroidery can’t handle while keeping a smooth texture.
- Chenille Patches: Give a vintage varsity, fuzzy feel that works well for fashion-forward lifestyle apparel.
Screen Printing and Other Alternative Methods
When your design features highly detailed illustrations or photorealistic elements that threads can’t replicate, printing is your best option.- Direct Screen Printing: Perfect for complex, multicolor artwork or illustrations on flat surfaces, like foam-front trucker caps.
- Heat Transfer: Offers bright, full-color graphic capabilities, but is less durable over time compared to embroidery.
- Sublimation Printing: A chemical dye process for vibrant, all-over patterns, but it only works on 100% polyester fabrics.
Decoration Method Quick-Reference
| Method | Best For | Detail Capacity | Durability |
| Flat Embroidery | Standard logos, text, classic corporate looks | Moderate (6pt+ font) | High (Outlasts garment) |
| 3D Puff Embroidery | Bold, blocky shapes and thick typography | Low (Needs thick lines) | High (Very durable) |
| Custom Patches | Fine details, rugged outdoor look, tactical style | High (Woven/PVC) | High (Stitched/Glued) |
| Screen Printing | Multi-color gradients, photorealistic art | Very High | Moderate (Can fade/crack) |
Navigating Bulk Custom Hat Orders Successfully
Managing a large group or team order requires operational planning to prevent unexpected delays and budget overruns.Understanding Minimum Order Quantities and Pricing Tiers
Minimum Order Quantities (MOQs) exist because manufacturers must cover their initial hardware setups, digitizing costs, and machine alignment.- Typical Minimums: Expect standard minimums of 12 to 24 hats from local shops, while industrial manufacturers usually require 50 to 100+ units per design.
- Price Breaks: Bulk ordering rewards scale. Your per-unit price drops significantly at volume breaks, typically at 50, 100, 250, and 500+ units.
- Budgeting: Always account for one-time digitizing and setup fees (usually $50 to $150) as separate items from your individual hat cost.
Sizing Strategy for Teams and Events
Trying to collect exact fitted hat sizes for a large group of people is an operational headache that almost always leads to mistakes. To make your life easier, stick to adjustable hat styles like snapbacks, strapbacks, or metal sliders. These styles comfortably fit about 80% of all adults (ranging from sizes 6⅞ to 7⅝). While fitted caps offer a clean, seamless athletic look, they require meticulous size tracking and offer zero flexibility. If you are ordering for mixed-age groups or family events, make sure to add a small percentage of dedicated youth sizes to your order breakdown.Production Timelines and Sample Approval Process
A standard turnaround timeline for custom headwear ranges from 2 to 4 weeks from final artwork approval to your doorstep. Rush processing is often available, but it comes at a steep premium. Never rely solely on a digital proof (a flat 2D mockup on a computer screen). Always ask your manufacturer for a physical pre-production sample or a physical “sew-out” proof before running the whole order. When you receive the sample, check for:- Logo alignment and placement accuracy.
- Thread color matching under natural lighting.
- Stitch density (ensure no underlying hat fabric is peeking through the embroidery).
- Overall build quality and seam stability.
How to Select a Reliable Custom Hat Manufacturer
Not all custom suppliers offer the same quality of work, service, or technical expertise. Use these quick benchmarks to vet your manufacturing partner.Red Flags vs. Green Flags When Vetting Suppliers
- Green Flags: * A comprehensive portfolio showing consistent embroidery density across different hat styles.
- Upfront, transparent pricing models with zero hidden checkout fees.
- Fast, responsive communication during the quote and mockup phases.
- A clear policy that offers physical samples or physical sew-out proofs.
- Red Flags:
- A portfolio filled entirely with generic stock digital mockups instead of real physical photos.
- Vague pricing structures or sudden fees tacked onto your final invoice.
- Delayed customer service communication or poor responsiveness.
- A rigid “no sample” policy that refuses pre-production physical proofs.
Essential Questions to Ask Before Committing
Before signing a contract or paying an invoice, protect your investment by asking these specific questions:- “What is your standard turnaround time, and are guaranteed rush options available if needed?”
- “Do you charge setup or digitizing fees, and are they per design or per order?”
- “Can I secure a physical sample or sew-out proof before full production begins?”
- “What is your operational policy on reprints if a clear quality or alignment issue occurs?”
- “Do you offer custom retail packaging, internal seam taping, or custom hang tags?”
- “What is the most direct channel to communicate with your production team during manufacturing?”
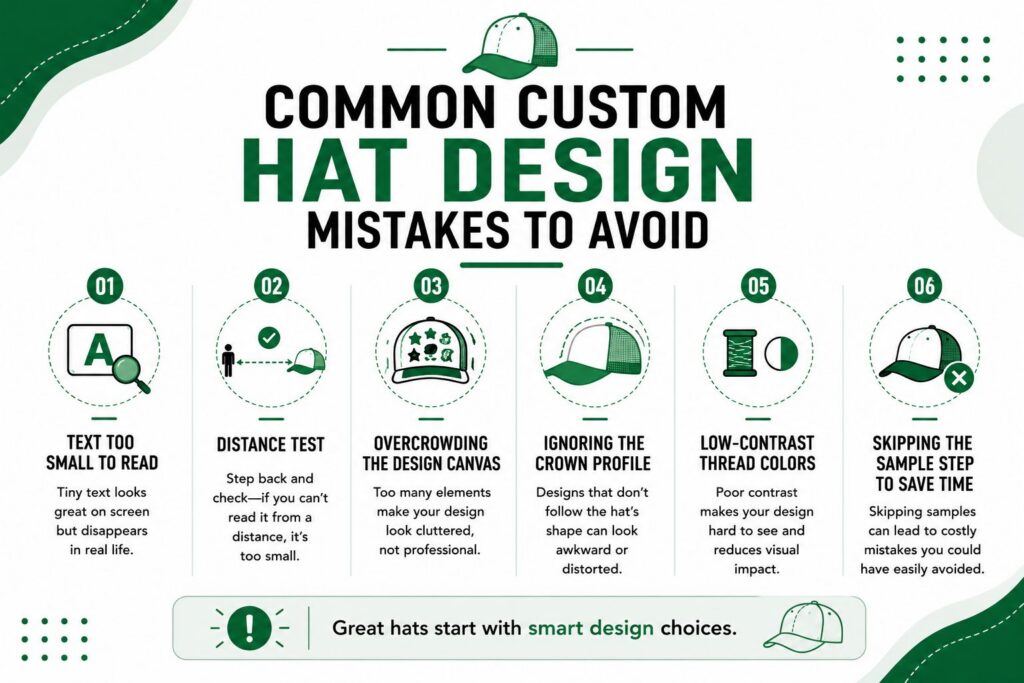
Common Custom Hat Design Mistakes to Avoid
Even experienced designers make preventable headwear errors. Review this checklist to sidestep costly production pitfalls.- Text Too Small to Read: The absolute minimum readable size for standard machine embroidery is a 6-point font, but an 8-point font is highly recommended. Use the
- Distance Test: if you cannot read your text from 10 feet away, it is too small for a hat. Simplify your taglines or remove unnecessary secondary text.
- Overcrowding the Design Canvas: Negative space is a critical element; your design needs breathing room. Keep your artwork confined to a maximum of 70% of the available front panel space. Don’t cram multiple sub-logos and dates together; pick one focal icon for the front and move secondary elements to the side or back panels.
- Ignoring the Crown Profile: A cap is a curved, 3D object, meaning flat vector artwork distorts differently across its surface than it does on a flat t-shirt. Low-profile, unstructured dad hats drape naturally and distort wide designs, while high-profile, structured snapbacks hold a rigid, upright shape. Always confirm with your supplier that your artwork matches the specific crown profile.
- Low-Contrast Thread Colors: Choosing thread colors that closely match the hat fabric ensures your design disappears under natural sunlight. Avoid execution errors like navy thread on a black hat or white on cream. Your threads should sit at least 3 to 4 shades away from the base fabric. A reliable test is to view your design file in pure grayscale—if the contrast looks weak, adjust your colors.
- Skipping the Sample Step to Save Time: Bypassing a physical sample to save a few days on a deadline is a massive gamble that usually backfires. Mass-producing thousands of units with a hidden mistake is incredibly expensive compared to a small upfront sampling fee. A physical sample costs between $25 to $75, while a bad bulk run can cost anywhere from $500 to $2,000 in unrecoverable reprint fees. Always slow down long enough to approve a physical sample.
Strategic Use Cases: Best Custom Hats for Your Project
To maximize the return on your custom apparel investment, match your specific business goals or team type to the right hat and decoration combination.- Corporate Teams & Corporate Giveaways: Pair a classic Dad Hat with subtle, flat embroidery. Stick to neutral tones (navy, black, slate) with high-contrast white or silver thread. This creates an understated, premium retail look that employees will happily wear outside the office.
- Tech Startups, Cafés, & Wellness Brands: Opt for an unstructured Dad Hat or an organic canvas cap. Use a minimalist, centered design or a small woven patch to preserve clean typography without the bulk of heavy stitching.
- Streetwear Labels & Creative Merch lines: Go with a structured, wool-blend Snapback Hat featuring bold 3D puff embroidery or a modern, custom PVC patch. Use vibrant, contrasting primary colors and take advantage of secondary placements like side panel icons or custom underbill graphics.
- Outdoor Brands, Fitness Groups, & Breweries: The classic choice is a Trucker Hat paired with a rugged, debossed leather patch or a durable PVC patch. This setup offers breathable comfort for active lifestyles while giving your brand a distinct, high-quality tactile feel.